Showing posts with label Whisker Graphics. Show all posts

Thursday, March 22, 2012

Happy Anniversary

Hi there! I had some time to get crafty today and decided to ink up a couple of my neglected stamps sets from Papertrey Ink!  


I used the layout from Retro Sketches 3 and the new color story from the Play Date Cafe Challenge!


(Note: I scored horizontal lines along the top and bottom edges of the sentiment panel, but it doesn't show up very well in the photo. One of these days I'm going to get my light box situation straightened out so my photos will turn out better.)

I'm going to send this to my parents for their anniversary! Hope they like it!!!

Thanks for stopping by!

Have a FABULOUS weekend!

---------------------------------
Supplies:
Stamps: Lock & Key, Love & Marriage, "happy" from Wreath For All Seasons, "anniversary" from Calendar Basics (Papertrey Ink)
Ink: Boysenberry and Curry Color Box (Clearsnap), Aegean Blue VersaMagic (Tsukineko), Jet Black StazOn (Tsukineko)
Cardstock: Stampers' Select White (Papertrey Ink)
Patterned Paper: Dotty Biscotti (Papertrey Ink)
Punch: Abstract Flower Edger Punch (EK Success)
Dies: Love Lives Here Die Collection (Papertrey Ink)
Felt: (Papertrey Ink)
Divine Twine: yellow/white (Whisker Graphics)
Martha Stewart Scoring Board


Wednesday, August 24, 2011

Polka Dots

Hey there! It's time for another Product Spotlight at DeNami Design! Today we're featuring the Solid Polka Dot Border!


This is such a versatile stamp! And it's available for ten percent off this week!!!


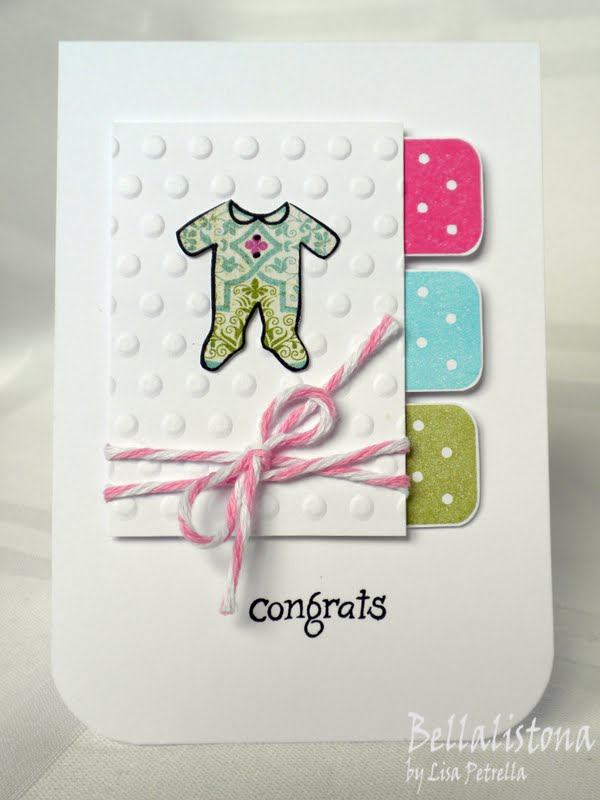
I decided to use the Solid Polka Dot Border to create some fun, colorful little tabs for these mini Baby Congrats cards! It was SO SIMPLE! I just stamped the image in different colors, cut them out, cut them in half, and then adhered them to my focal panels!

Here's a closer look at each card:


I hope you like my creations for today and feel inspired to get inky!!! Be sure to check out the DeNami Design Blog to see all of the FABULOUS ways my fellow DT gals have used this same image!

And don't forget to enter for a chance to win my BLOG CANDY GIVEAWAY!!!! It's SO EASY to enter, and I'm giving away FOUR different prize packages!!! Click HERE for all of the details!!!

Thanks for stopping by!

--------------------------------
Supplies:
Stamps: Solid Polka Dot Border K80, Onesie E115, "Congrats" from the Thoughtful Greetings Stamp Set PF48 (DeNami Design)
Ink: Aqua Color Box (Clearsnap), Rose Bud Memento (Tsukineko), Thatched Straw VersaMagic (Tsukineko), Tea Leaves VersaMagic (Tsukineko), Aegean Blue VersaMagic (Tsukineko), Chestnut Roan Color Box (Clearsnap), Onyx Black VersaFine (Tsukineko)
Cardstock: Stampers' Select White (Papertrey Ink)
Patterned Paper: Paige Cabana Stripes (DeNami Design), Twig: Pleased Plaid (Little Yellow Bicycle), Indie Bloom (Basic Grey)
Twine: Aqua and White Divine Twine (Whisker Graphics), Brown and White Baker's Twine (Martha Stewart Crafts), Pink and White Twine (My Mind's Eye)
Cuttlebug Embossing Folder: Polka Dots (Provo Craft)
Permanent Adhesive Tape: (Recollections)
Pop Dots: (All Night Media)
Crop-A-Dile Corner Chomper: (We R Memory Keepers)


Wednesday, April 13, 2011

DeNami Product Spotlight Day!

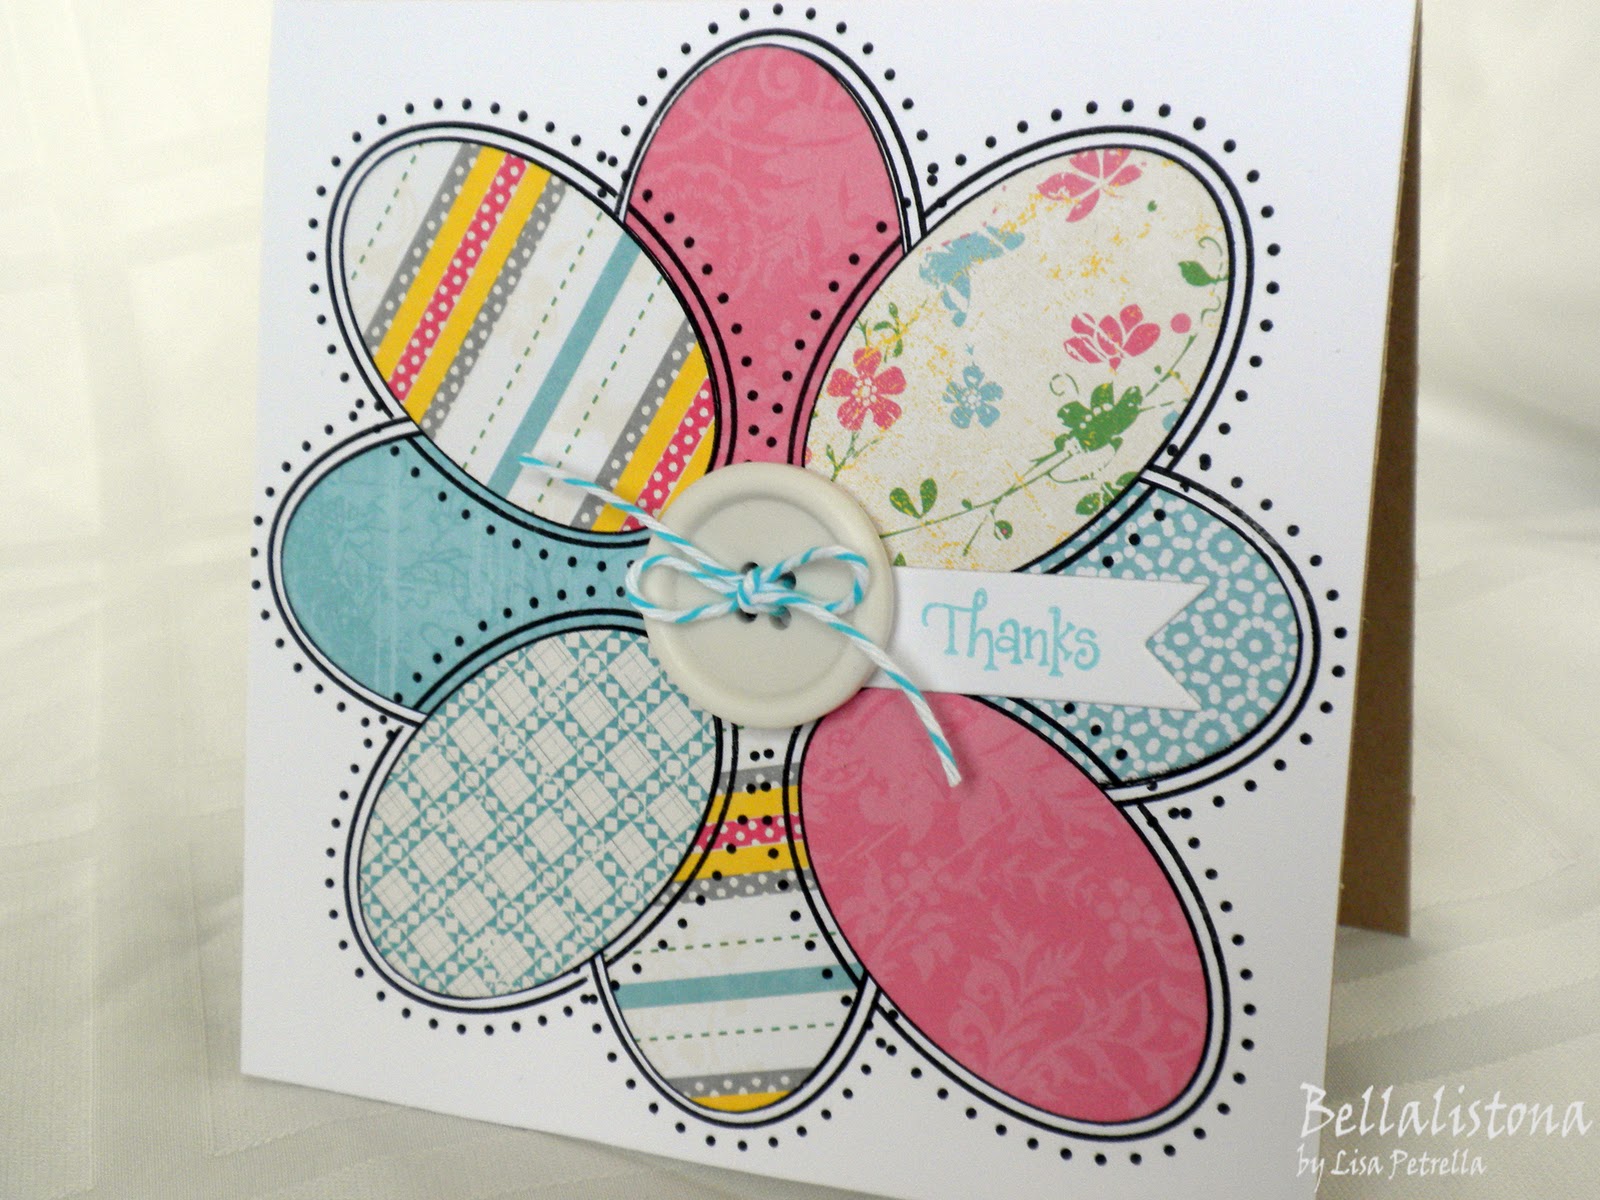
Hey there! It's Product Spotlight Day at DeNami Design! Today we're featuring the Whimsical Oval Frame J141. This stamp makes a gorgeous frame, of course, but I wanted to try to do something different with it. Here's what I came up with:


I began by stamping the Whimsical Oval Frame eight times on various pieces of patterned paper from the Clothesline collection (Little Yellow Bicycle). I cut out the center ovals and set them aside. Then, using my Stamp-A-Ma-Jig I stamped the oval frame four times, turning my paper 90 degrees each time. Then, I chose four of my previously cut patterned paper ovals and adhered them to the ovals on my focal point. Then, I used my Stamp-A-Ma-Jig again to stamp the oval four more times in between the four ovals I previously stamped and adhered patterned paper ovals to their centers as well.


I found this GIANT button in my White Boutique Buttons collection from DeNami Design. The sentiment is from the Everyday Greetings Stamp Set PF29, and I stamped it onto a banner cut with the Double Ended Banner Die from PTI. And I thought the aqua and white baker's twine from Whisker Graphics was a nice detail!


What do you think??? 

Be sure to head on over to the DeNami Design Blog to see how my fellow DT gals and our Guest Designer, Sue Lelli, used this same image!!!! You will LOVE what they've created!!!
 
Thanks for stopping by!

Friday, February 11, 2011

My Favorite DeNami Design Products

Happy Friday, blog friends!!! Today it's my turn to share some of my FAVORITE products from DeNami Design!! Boy oh boy, this was a TOUGH decision! There were SO MANY things I wanted to include on this list!!! Alas, here are my Top 7:


And here are a couple of Valentine's Day projects I made using some of my FAVORITES:

This little package is for my mom! I filled a 3x3 Clear Boutique Box (DeNami Design) with her favorite candy, Good and Plenty, and decorated it in pink, black and white (the same colors as the candy)!

This one is for my dad! It's actually a container of wasabi-flavored almonds! I just used my DeNami stamps and some cardstock to dress it up!!!

Visit the DeNami Design Blog to learn more about WHY I chose these particular products as my favorites!!!

I also wanted to share how I keep track of which DeNami Design stamps I own. This handy little binder was simple and inexpensive to make. Plus, it's small enough to carry in my purse/bag when I attend stamping conventions, so I don't accidentally purchase any stamps I already have at home.


I bought this small three-ring binder at Target. It measures 7-1/8" x 8-7/8".


I created four dividers with aqua and lime cardstock and some Avery Note Tabs. The letters on the tabs represent the codes on the DeNami Design stamps. So, all of my A, B, C, D, and E stamps are in the first section of the binder and so on.

Here's a peek inside:


The white sheets are just printer paper cut in half. Since it's rather thin, I used reinforcements around the punched holes. I measured out the boxes and drew in the stitched lines. If you wanted to keep things super simple you could eliminate this part of the design. I stamped each image (in numerical order) and wrote the code and name of the image below it. As you can see, I made sure to leave some blank spaces for future purchases *wink*!


The larger the images, the less I put on each page. Some pages only contain one image.

Thanks for stopping by today!!! I hope you enjoyed my projects! Have a wonderful weekend!

--------------------------
Supplies for Chickie Valentine Box:
Ink: Tuxedo Black Memento (Tsukineko), Rose Bud Memento (Tsukineko)
Copic Sketch Markers
Cardstock: (all scraps from my scrap box)
Glitter: Citrone (DeNami Design)
Ribbon: Hot Pink Grosgrain (DeNami Design)
Button: (purchased at Michaels)
Twine: (Whisker Graphics)
Punches: Scallop Heart (Marvy Uchida), Lace Heart Edge Punch (Martha Stewart Crafts) 
Boutique Box: 3x3 Clear (DeNami Design)
Quickie Glue Pen
Glue Dots
Double-Sided Tape: (X-Press It)

Supplies for XOXO Package:
Ink: Onyx Black VersaFine (Tsukineko), Blazing Red StazOn (Tsukineko)
Cardstock: Vintage Cream (Papertrey Ink), Red and Black (scraps from my scrap box)
Punch: Scallop Heart (Marvy Uchida)
Pop Dots: (All Night Media)
Double-Sided Tape: (X-Press It)

Wednesday, February 9, 2011

With All My Heart

Hello, blog friends! It's Product Spotlight Day at DeNami Design, and today we are featuring a super sweet sentiment:
With all my heart (F189)!


How about that font?! Ahhh...swoon...so whimsical! 

I created the plaid panel using Rose Bud and Angel Pink Memento inks and my handy dandy Three Line Border N128 stamp!!! I TOLD YOU I {HEART} that stamp!!!

And let's take a closer look at Chickie:


If you're like me, then you LOVE the DeNami chickies with all YOUR heart! Here I used the Large Chickie I60. I stamped him onto pale yellow cardstock, added some color to him with Copic Sketch Markers, and jazzed him up with some Citrone Sparklets Glitter (DeNami Design)! That citrone color is just perfect for adding sparkle to any of the DeNami chickies!!! Then, I created a string of hearts for him using the newly released Hearts Stamp Set PF43!!! He's pretty stinkin' cute, huh?!?! He looks just like the Valentine Chickie C69 (only much BIGGER!)!


I purchased a pack of these heart doilies at Michaels. They were in the Valentine's Day baking section. I'm really diggin' the doily craze these days! Thinkin' I might have to buy some round doilies as well!


I hope this sweet little creation makes you smile! Leave me a comment and let me know what you think! I truly appreciate your feedback "with all my heart" *wink*!!!

And be sure to stop by the DeNami Design Blog to see the fabulous cards/projects the rest of the Design Team has created using this featured product!
Thanks for stopping by today! Have a wonderful Wednesday!


-------------------------
Supplies:
Ink: Rose Bud Memento (Tsukineko), Angel Pink Memento (Tsukineko), Tuxedo Black Memento (Tsukineko), Onyx Black VersaFine (Tsukineko)
Copic Sketch Markers
Cardstock: White Cards (DeNami Design), Magenta Cards (DeNami Design), Stampers' Select White (Papertrey Ink), Lemon Tart (Papertrey Ink), Aqua (from my box of scraps)
Heart Doily: (Royal Lace)
Punch: Scallop Heart (Marvy Uchida), Scalloped Scallop Edger Punch (EK Success)
Button: Boutique Buttons (DeNami Design)
Twine: Divine Twine (Whisker Graphics)
Glitter: Citrone Sparklets Glitter (DeNami Design)
Double-Sided Tape: (X-Press It)
Quickie Glue Pen: (Sakura)
Adhesive Tape Runner: (Therm-o-web)
Pop Dots: (All Night Media)
Glue Dots

Wednesday, February 2, 2011

CASING

Hi there! Just a quick post today to share a card I made for the most recent Lawnscaping Challenge! I'm cutting it really close to the deadline, so no time for chit-chat! HA!

I chose to case THIS card from Kelly Marie! And here's what I came up with:


I handstamped the main background using the little paper clip image from Just My Type (Lawn Fawn) and three different colors of ink (see supply list below). I coated the keys and space bar with Enamel Accents (Ranger)!! I have LOVED what Karen Baker has been creating with Enamel Accents, so I HAD to buy some! (Thanks, Karen!) Handy tip for anyone who lives at high altitude (I live at 9000 feet): the Enamel Accents will start oozing out of the bottle immediately upon opening it. Just hold it over a scrap piece of paper for a little while and it will eventually stop oozing on its own. Otherwise it will be coming out too quickly to control and will end up getting all over your project (Yep...had to restamp my typewriter after making a bit of a mess the first time around! Worked perfectly, though, after I let it settle down. You'd think after having experience with exploding yogurt and ice cream that grows beyond its packaging that I'd know better, but oh well *wink*)

 
I did a lot more distressing on here than I typically do. I think I did an okay job, but not great---definitely need some practice. Any tips from all of you expert distressers out there? What's your favorite ink to use for distressing?
 
Thanks for stopping by today!
 
------------------------------
Supplies:
Stamps: Just My Type (Lawn Fawn), Background Basics: Text Style II (PTI)
Ink: Tuxedo Black Memento (Tsukineko), Onyx Black VersaFine (Tsukineko), Orange Zest (PTI), Raspberry Fizz (PTI), Prussian Blue Fluid Chalk Inkpad (Clearsnap), Rusty Hinge Distress Ink (Ranger: Tim Holtz)
Cardstock: Vintage Cream (PTI)
Patterned Paper: Dotty Biscotti (PTI)
Copic Sketch Markers
Quickie Glue Pen: (Sakura)
Enamel Accents: (Ranger)
Crop-A-Dile Corner Chomper: (We R Memory Keepers)
Ribbon: Orange Zest Grosgrain (PTI)
Button: Boutique Buttons (DeNami Design)
Twine: (Whisker Graphics)
 

Monday, January 24, 2011

PDCC #65 - You're Tweet

Hey there! Have you seen the latest color combo over at The Play Date Cafe?!?! LOVE IT!!!! I'm really digging the whole gray + any other color these days---so super hip and trendy!


And here's my creation:


I just received the newly released Birdcage E143 and You're Tweet C82 stamps (DeNami Design) in the mail and had to ink them up right away!!! I also used the Single Tweety Bird A98 and a couple of the birdies from the Tweety Bird Border K83 (DeNami Design)! The birds on this border stamp are spaced really nicely, which makes it super simple to ink up individual birdies using a Dew Drop or Cat's Eye ink pad! Here are a couple of close-ups:


The layered notebook sheets (which I ended up liking) actually resulted from a mistake. In my original design I inked up the bird cages and birdies in London Fog ink. Well...once I had it all together, it just wasn't working for me. I decided that the bird cages and birdies needed to POP more and that Tuxedo Black ink would do the trick. I layered the new panel on top of the old notebook panel and folded up the edge for fun! Just goes to show that mistakes can sometimes lead to good things!


What do you think? I hope you like my card and feel inspired to create something today!!

On a personal note...today is a REALLY HAPPY DAY in the Petrella house!!! The Steelers won yesterday and that means...you got it...Pittsburgh's goin' to the Super Bowl!!! (said of course to the tune of the Steeler song...Here We Go!) WOOHOO! What a game!!! We watched it at our friends' house with some of my husband's co-workers! It was LOTS of fun! We wore our Steeler gear, brought along our Terrible Towels, and shared some Polish Mistakes---these yummy snacks that my Great-Aunt Lois always made for family get-togethers (including Steeler games) growing up in the Burgh!!! Another guy (who grew up in NY) and his family were all decked out in Jets attire! They even tracked down green tortilla chips (guacamole flavored) because they didn't want to bring anything GOLD (wouldn't want to look like a Black & Gold Steelers fan...HA!). His little girl (who's 5) said to me..."Oh yeah, well ALL my friends are JETS fans and even my stuffed animals are JETS fans!!" It was hilarious!

Okay...sorry for the LOOOONNNNGGGG post today! Hope your week is off to a FANTASTIC start too! Thanks for stopping by!

----------------------------------- 
Supplies:
Ink: Tuxedo Black Memento (Tsukineko), Orange Zest (Papertrey Ink)
Cardstock: Stampers' Select White (Papertrey Ink), Charcoal Grey Cover (The Paper Company)
Patterned Paper: Basics White Paper Pad (Basic Grey), 8x8 Flower Ledger (Making Memories)
Cuttlebug Embossing Folder: Polka Dots (Provo Craft)
Round Binding Edge Edger Punch: (EK Success)
Copic Sketch Markers
Ribbon: Orange Zest Classic Grosgrain (Papertrey Ink)
Button: (purchased at Michaels)
Twine: (Whisker Graphics)
Floss: (Janlynn)
Black Fine Tip Marker: (PaperMate)
Double Sided Tape: (Express It)
Pop Dots: (All Night Media)


Wednesday, January 5, 2011

With Love

Hi there! Some of my fellow DeNami DT gals have been talking about and participating in the Color Q Challenges recently, so I thought I'd check it out!!! And when I saw the most recent color combo (ahhhh...GORGEOUS), I just knew I had to play along!!!


Here's what I came up with:


I inked up my Three Line Border N128 stamp (DeNami Design) in black ink and created a criss-cross pattern on white cardstock. Then I punched out the scalloped heart. The tiny hearts in the center are from the newly released Hearts Stamps Set PF43 (DeNami Design)---LOVE THOSE! I just stamped them in aqua ink and cut them out to create a trio.


The whimsical little "with love" sentiment is from the Love Sentiments Stamp Set PF42, which just released on January 1st! I LOVE how the "i" is dotted with a teeny heart! My parents gave me a Michaels gift card for Christmas, and one of the things I bought was the Lace Heart border punch from Martha Stewart! I think it's so pretty!!!


Thanks for stopping by today! I hope you're having a fantastic week! Be sure to stop by the Color Q Challenge Blog for all of the details about how you can play along and to see all of the AWESOME cards created by the other participants!

------------------------------------- 
Supplies:
Ink: Onyx Black VersaFine (Tsukineko), Aqua Color Box Cat's Eye (Clearsnap)
Cardstock: Stampers' Select White (Papertrey Ink), Ocean Breeze (Bazzill Basics), Cornmeal (Bazzill Basics)
Dies: Labels One (Spellbinders)
Punches: Scalloped Heart (Marvy Uchida), Lace Heart (Martha Stewart Crafts)
Twine: Divine Twine (Whisker Graphics)
Brads: Lily White Mini Brads (Doodlebug Design)
Martha Stewart Scoring Board
Ribbon (purchased at Michaels)
Adhesive Tape Runner (Therm-o-web)
Glue Dots
Double-Sided Tape (X-Press It)
Pop Dots (All Night Media)

Monday, January 3, 2011

Thinking of You

Hello there! It's been bitterly cold here in the mountains the past few days (below zero in the evenings), so today I'm creating my own sunshine *wink*!!! This is a card I made featuring the newly released Small Cloud E137 image from DeNami Design.


Don't those little clouds look so fluffy and pretty all sparkled up with glitter? And I popped a couple of them up, too, to add dimension. The larger "cloud" is actually the top portion of the Thought Bubble F180 (DeNami Design)---I just stamped it on a scrap piece of white cardstock, cut it out, and adhered it to the card with double-sided tape. I think it makes for a nice combination with the small clouds. 

The rays of sunshine were created using the Three Line Border N128(DeNami Design). I inked the stamp up once and then stamped it multiple times before re-inking it so that the rays would be slightly different intensities of yellow. And how about that whimsical kite??? I paper pieced it with brightly colored cardstock---lovin' those POPS of color!

This card makes me happy, and I hope it brings some sunshine to your day, too!

What did you think of the new DeNami release?!?! ADORABLE, right? Did you order some new goodies? I've been having SO MUCH FUN getting inky with my stash of DeNami! I have LOTS to share in the upcoming weeks! YAY! Looking forward to seeing YOUR creations as well!

Thanks for stopping by! Have a FABULOUS day!

-------------------------
Supplies:
Ink: Tim Holtz Tumbled Glass Distress Ink (Ranger), Onyx Black VersaFine (Tsukineko), Canary Color Box (Clearsnap), Tea Leaves VersaMagic (Tsukineko)
Cardstock: Sky Blue (DeNami Design), Magenta (DeNami Design), Leaf Green (DeNami Design), White (DeNami Design)
Button: Boutique Buttons (DeNami Design)
Quickie Glue Pen (Sakura)
Glitter: Xtra Fine Sparklets (DeNami Design)
Twine: Divine Twine (Whisker Graphics)
Punch: 1" Circle Punch (Marvy Uchida)
Adhesive Tape Runner (Therm-o-web)
Pop Dots (All Night Media)
Glue Dots
Fine Tip Black Marker (PaperMate)


Thursday, November 18, 2010

Gobble Gobble

On Tuesday I met up with my sweet friend, Michele, to get inky! We always have so much fun chatting and stamping together! During our crafty time I created a few Thanksgiving cards/projects. Today I'm going to share the card I created using Kazan's fabulous sketch over at 2 Sketches 4 You.


I used the Gobble, Gobble stamp set and coordinating die from Papertrey Ink. Isn't Mr. Turkey handsome?!?


I've had this set since August and this is the first time I've inked it up. Honestly, I have quite a collection of stamp sets that have not seen ink yet. I keep telling myself that I have to stop ordering things until I use what I have, but then every month (without fail) all of these stamp companies release the cutest things and I just can't resist. Does anyone else have this problem? Any advice (besides joining stampaholics anonymous *wink*)?

I hope you like my creation for today! Thanks for stopping by! And THANK YOU SO MUCH for all of your sweet comments on my DeNami Design Blog Hop post!!! You totally make me smile!

------------------------------------
Supplies:
Stamped Images: "Gobble, Gobble" (Papertrey Ink)
Ink: "Rich Cocoa Memento" (Tsukineko)
Dies: "Gobble, Gobble Die" (Papertrey Ink)
Cardstock: "Kraft" (Papertrey Ink), "Parakeet" (Bazzill Basics), "Suede Brown" (Bazzill Basics)
Patterned Paper: "yellow with sentiments" (Die Cuts With a View), "Dotty Biscotti" (Papertrey Ink), "Bitty Box Basics" (Papertrey Ink)
Ribbon: "Chocolate Brown Grosgrain" (DeNami Design)
Button: (DeNami Design)
Baker's Twine: "Divine Twine" (Whisker Graphics)
Fine Tip Brown Marker


Sunday, November 14, 2010

DeNami Christmas Blog Hop

Hey there! Thanks for hopping along with us in the DeNami Design Christmas Blog Hop! I hope you've been inspired by all of the participants' fantastic creations! I'm the last stop on the hop, and you should have come to my blog via Beverly's blog. If not, no worries, you can head to the DeNami Blog to start at the very beginning! And be sure to leave comments along the way as DeNami is giving away gift certificates to random commenters!!!

Instead of making a card for the hop, I decided to do something different and use some of my DeNami Design products to decorate this frame!


I started with a blank frame from TPC Studios. Don't you just love the shape of that frame? I repeatedly stamped the "Harlequin Border N112" (DeNami Design) in Robin's Egg ink (Color Box) onto Vintage Cream cardstock (Papertrey Ink) to create my own background paper. I layed the frame on top of the background paper, traced around it and cut it out. Then, I mounted it to the front of the frame and distressed the edges with Desert Sand Memento ink (Tsukineko).

Next, I stamped the "Steam Curl D87" (DeNami Design) around the frame with my glue pad and covered the images with Xtra Fine White Sparklets (DeNami Design).

I cut four strips of Frosted Teal cardstock (Bazzill Basics) and adhered those to the edges of the frame with Scor-Tape (Scor-Pal). Then, I wrapped the Chocolate Brown Grosgrain Ribbon (DeNami Design) around and through the frame so that it can easily be hung up for display. I die cut snowflakes from Vintage Cream cardstock (PTI) and red felt (My Favorite Things) using the Snowflakes Die-namics from My Favorite Things. I cut two snowflakes from Kraft cardstock (PTI) using punches from Martha Stewart Crafts. The scallop circle is cut from Ocean Tides felt (PTI) using one of the Limitless Layers Circle Collection Dies (PTI). Then, I embellished the snowflakes with buttons (DeNami Design) and twine (Whisker Graphics and PTI).


I really like the way these close-up photos turned out. This was a pretty challenging project to photograph because I had to contend with the glare from the actual photo within the frame and the way the lighting was playing off of the glitter. I am not at all a photographer, but I did the best I could.

I think this would make a really cute gift for my parents. Since they live so far away, they are always excited to receive snail mail goodies and love having recent photos of us! 


Thanks for taking the time to check out my creation for the DeNami Design Christmas Blog Hop! I hope it inspires you to get crafty!!! Now it's time to head back to the DeNami Design Blog and leave them a sweet comment for organizing such a fabulous event!

Have a wonderful day!


Wednesday, August 25, 2010

Off the Wall Craftiness Challenge #21

Here's a card I created for Kim Wilson's most recent challenge over at Off the Wall Craftiness!


This is the inspiration photo for the challenge:


After seeing this inspiration photo, I just had to make something with the "Friendship Jar" and "Friendship Jar Fillers" sets from Papertrey Ink!! I am LOVIN' these sets! So much fun playing around with all of the possibilities! 

I picked up a couple of sheets of patterned paper from Cosmo Cricket's "DeLovely" line the last time I was at Archivers, and the colors were a good match for this challenge too!


I used my handy Scor-Tape to ruffle the ribbon, but then I fluffed up the loopies because I thought it gave it a sort of ribbon candy look! (Have you ever had ribbon candy? It's popular around the Christmas holiday.)

Here's a close-up:


Thanks for stopping by today! I hope you were inspired at least a tiny bit!

-----------------------------
Supplies:
Stamped Images: "Friendship Jar" and "Friendship Jar Fillers" (Papertrey Ink)
Ink: "Onyx Black VersaFine" (Tsukineko), "Tuxedo Black Memento" (Tsukineko)
Cardstock: "Stampers' Choice White" (Papertrey Ink), Aqua (a piece from my scrap box)
Patterned Paper: "DeLovely: DeLimit" and "DeLovely: DeLuxe" (Cosmo Cricket)
Copic Sketch Markers
Baker's Twine: "Divine Twine" (Whisker Graphics)
Buttons: aqua & green (SEI), pink (DeNami Design)
Ribbon: "Hibiscus Burst Saddle Stitched Ribbon" (Papertrey Ink)
Scor-Tape (Scor-Pal)
Pop Dots (All Night Media)
Zots (Therm-o-web)
Adhesive Tape Runner (Therm-o-web)
Medium Scallop Die (Papertrey Ink)

Finished Card Size: 4.25" x 5.5"

Wednesday, June 2, 2010

Celebrate Life

Hello there! Here's a card I created using the most recent sketch over at 2 Sketches 4 You:


And here's the inside:


I used the "Round Leafy Tree" image from DeNami Design, which is one of my favorites! The idea was to capture the four seasons that bring magic and wonder to each year of our lives. (Note: I used a mask to create the leafless tree for winter.)

I added a little sparkle to each tree with a Stardust Clear Gelly Roll pen (Sakura) and added "snow" to the winter tree by applying white glitter to the branches. Thanks for that idea, Michele! Confession time: I originally tried a white "Souffle" pen, but it didn't give me the effect I was looking for. I was expecting it to be white and puffy, but it never really fluffed up---must be the altitude. Ha! 


The sweet little yellow & white baker's twine is from Whisker Graphics----LOVE IT!!!!!!


Hope you're having a FABULOUS week! Thanks for stopping by!

--------------------------------
Supplies:
Stamped Image - "Round Leafy Tree" (DeNami Design)
Stamped Sentiment - "Express It" (Making Memories)
Ink - "Tuxedo Black Memento" (Tsukineko), "Onyx Black Versafine" (Tsukineko)
Copic Sketch Markers
Cardstock - "Stampers' Choice White" (PTI), "Kraft" (PTI), "Lime Crush" (Bazzill Basics), "Ocean Breeze" (Bazzill Basics), "Buttercup Cover" (The Paper Company)
Circle Template (Staedtler)
"Stardust Clear Gelly Roll Pen" (Sakura)
Edge Distresser Tool (Heidi Swapp)
White Uni-ball Signo Pen
White Glitter (Doodlebug Design)
Quickie Glue Pen (Sakura)
Divine Twine (Whisker Graphics)
Scor-Tape (Scor-Pal)
Zots (Therm-o-web)
Pop Dots (All Night Media)

Finished Card Size: 5.5" x 4.25"